Showing posts with label Guides. Show all posts

Sunday, August 4, 2024

How to Set Timer on iPhone’s Camera

1:23 AM 0

 Let’s admit it: iPhones have the best phone cameras. The camera quality of the iPhone has no comparison with Android, and it can even compete with a few DSLRs. While iPhone cameras are great for capturing amazing pictures, what if you don’t have anyone nearby to capture your portrait shots?

You can grab your iPhone in one hand and capture a picture, but there will be a loss in quality due to shaky hands. To capture the best shots, it’s recommended to ask someone to take your photo or else use the timer feature of your iPhone’s camera.

If you have just purchased a new iPhone, you may find it hard to access certain camera features. A built-in timer in your iPhone camera settings allows you to set a delay before the photo is taken. You can utilize that feature for capturing self-portraits or a group photo.

Hence, if you don’t know how to set the timer on an iPhone camera, continue reading the guide. Below, we have shared some simple steps to set the timer on an iPhone camera for capturing a perfect shot without pressing the camera shutter button. Let’s get started.

Why use the Timer Feature on the iPhone Camera?

There can be various reasons for utilizing the timer feature on an iPhone camera. You can utilize this feature not only on your iPhone but also on your Android phones. Here are some important reasons for using the Timer feature on iPhone cameras.

Avoid Shakiness while capturing

One of the prominent reasons why people use a Camera Timer is to reduce the camera shake. As we all know, the camera is never stable when held, and the timer feature allows users to place the phone on a stable surface before posing for the shot.

Great for self-portraits

The timer feature of the iPhone camera is extremely useful for capturing self-portrait shots. This allows you to place a camera on a stable surface and gives you time to get into position before the picture is taken.

Great for Group Photos

As we all know, we always want someone to capture our photos. And when it comes to the group photos, it’s bound to have someone unknown capturing the photo. This is where the camera timer comes to the rescue. It just gives the entire group enough time to be ready for the shot and ensures no one misses being in the photo.

Great for capturing creative photos

The timer feature is extremely helpful for capturing experimental shots. The 10-second timer duration gives users enough time to carry on with their experimental shots and try the creative compositions.

How to Set up iPhone Camera Timer

You don’t need to install any dedicated camera app from the App Store because the Timer feature is hidden within the Camera settings of your iPhone. Follow some simple steps mentioned below to set up an iPhone camera timer.

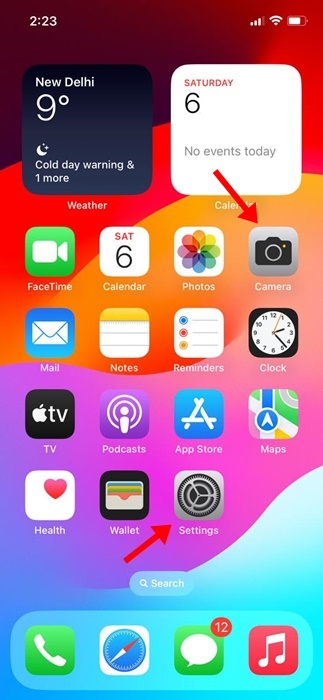
1. To get started, open the Camera app on your iPhone.

Camera

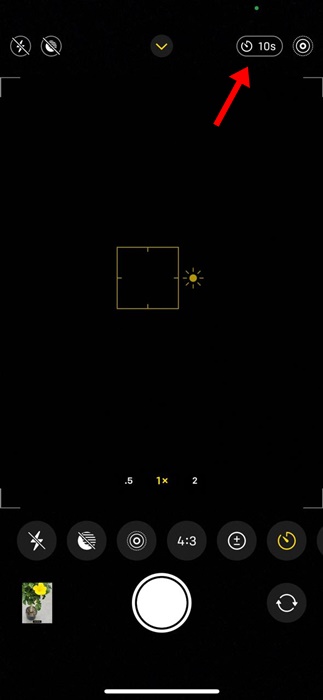
2. When the camera app opens, tap on the Upward Arrow at the top center of the camera interface.

Upward Arrow

3. You will find a list of options at the bottom of the screen. Find the Timer icon.

Timer icon

4. Tap on the Timer icon to see all available timer options.

available timer options

5. On the iPhone, you need to set the timer to 3 or 10 seconds. You can choose whichever option you would like.

6. Once you set the timer duration, simply position your iPhone on a surface or tripod and tap the Camera Shutter button.

set the timer duration

7. Tapping the camera shutter button will immediately start the timer, and the photo will be captured once the timer ends.

That’s it! This is how you can set timer on an iPhone camera.

So, this guide is all about setting timers on an iPhone camera. We also listed a few important reasons why you should utilize the timer feature of any phone camera. Let us know if you need more help in setting a timer on the iPhone camera.

How to Use Quick Crop Feature in Photos App on iPhone

1:22 AM 0

 Over the years, image cropping has served as an evergreen way to improve a photo’s composition. People use the crop tool to cut out the distractions or to focus on a specific subject to draw the viewer’s attention.

On iPhone, you don’t need a dedicated image cropper to cut out photobombs from your pictures. The default photo editor of the iPhone has a crop tool that’s of great use and allows you to crop pictures the way you want.

If you have used iOS 16 or older, you may know that using the Crop tool of the Photos app means opening an image in the full-screen mode and manually picking the area to be cropped. However, things have changed a bit on iOS 17.

How to Use Quick Crop Feature in Photos App on iPhone

iOS 17 has a quick crop feature that saves you a few clicks while cropping a picture. The feature lets you crop photos in just a single tap. So, if you often need cropping pictures on your iPhone, you would like to use the new Quick Crop feature.

The new Quick Crop feature is available on iO17, and it serves as a much faster & easier way to crop photos on iPhone. Below, we have shared steps to use the Quick Crop in Photos app on iPhone. Let’s get started.

How to Use Quick Crop on iPhone?

To utilize the Quick Crop feature, you need to ensure your iPhone is running on iOS 17. Then, follow the steps below to use Quick Crop in iOS 17.

1. To get started, open the Photos app on your iPhone.

2. When the Photos app opens, open the photo you want to crop.

open the photo

3. Now, use the two-finger gesture to zoom into the photo. Adjust the photo the way you want it to be.

4. Once a photo looks how you want, tap the Crop button at the top right corner.

Crop

5. On the next screen, you can further adjust your photo. Once satisfied with the result, tap the Done button to save the Cropped image.

Done

That’s it! This is how you can use the Quick Crop feature on an iPhone.

How do you adjust the aspect ratio in iPhone Quick Crop?

If you’ve already used the feature, you will agree that Quick Crop crops your image in precisely the aspect ratio shown on the iPhone screen. However, if you want, you can customize the Quick Crop functionality to follow your given aspect ratio. Here’s how you can adjust the aspect ratio in Quick Crop.

1. First, open the photo in the Photos app on your iPhone.

open the photo

2. Now, use the gesture to zoom into the photo.

3. Now, instead of tapping on the Crop button at the top-right corner, long press on it.

Crop

4. You will find several aspect ratios. Depending on your needs, you can select between Original, Widescreen, or Square for cropping the photo

.aspect ratios

5. After cropping the image, you can make further adjustments like adjusting the colors, applying filters, etc.

make further adjustments

That’s it! This is how you can manually select the Aspect Ratio in the Quick Crop feature of iPhone.

So, this guide is all about how to use the Quick Crop feature of the iPhone. To use this feature, you must ensure your iPhone uses iOS 17. Let us know if you need more help using the Quick Crop feature of the iPhone.

How to Check iPhone Warranty Status (All Methods)

1:21 AM 0

 Regarding premium smartphones, the iPhone from Apple seems to be the only best option. People trust iPhones for various reasons, such as seamless integration with other Apple devices, user-friendly operating system interface, and a robust Apple App Store.

Also, iPhones are known for their excellent build quality, performance & stability, and regular software updates. From the quality of the product to the support system, when you invest your hard-earned money on an iPhone, you expect the phone to be top-notch.

With every Apple device you purchase, you get a one-year standard warranty. If you don’t know, an Apple Warranty is a protection plan that covers various defects & issues in Apple Products.

If you are planning to purchase a new iPhone or already have one, it’s important to understand the warranty status. Checking the iPhone Warranty Status will help you troubleshoot, upgrade your device, etc. Also, if your iPhone malfunctions during its warranty period, you can get it repaired for free from the authorized Apple service centers.

How to Check iPhone Warranty Status (All Methods)

There are not one, but many different ways to check iPhone Warranty Status. Below, we have mentioned some of the best & easiest methods to check iPhone Warranty Status. Let’s get started.

1. Check iPhone Warranty via the Apple My Support Website

You can easily visit the Apple My Support website to check your iPhone Warranty Status. Here’s what you need to do.

1. Open any web browser and visit this Apple My Support Page. Next, sign in using the same Apple ID as your iPhone.

sign in using the same Apple ID

2. Now select your iPhone.

iPhone

3. Scroll down to the Repair and Services section. You will be able to see the Estimated Expiration date.

e Estimated Expiration date

That’s it! This is how you can check your iPhone warranty status via the Apple My Support website.

2. Check iPhone Warranty Status via Check Coverage Website

Apple has a dedicated website to check the warranty status of the Apple products. You can use the Check Coverage website to view your iPhone’s warranty status. Here’s what you need to do.

1. Open your favorite web browser and visit this webpage.

2. Now, head to Settings > General > About on your iPhone and note the serial number.

note the serial number

3. Now switch to the desktop web browser where the Check Coverage website is open. Enter your iPhone’s serial number, fill out the CAPTCHA code, and click Submit. If your device is showing up, click on it.

CAPTCHA

4. The website will instantly show you the warranty status of your iPhone.

warranty status of your iPhone

That’s it! That’s how easy it is to check your iPhone’s warranty status via the Check Coverage website.

3. Check iPhone Warranty via the Apple Support App

Apple Support app is available on the App Store, and it’s a one-stop solution for all the support you need for your Apple Products. You can download & install the app on your iPhone and use it to check the Warranty Status. Here’s what you need to do.

1. Download & install the Apple Support app on your iPhone.

Apple Support app

2. Open the app and log in with your Apple ID.

3. Now tap on your iPhone name.

iPhone name


4. On the next screen, tap on the Device Details.

Device Details

5. Now scroll down to the Coverage info. You will find your iPhone warranty.

iPhone warranty

That’s it! This is how you can use the Apple Support app to check the status of your iPhone warranty.

4. Check iPhone Warranty from the Settings App

If you don’t want to rely on any website or dedicated app to check your iPhone’s warranty status, you need to follow this method. Here’s how you can check your iPhone Warranty Status through settings.

1. Open your iPhone’s Settings app and tap on General.

General

2. On the General screen, tap on the About.

About

3. Scroll down a bit and tap on the Coverage.

4. Now, select your iPhone, and you will be able to see its warranty status.

Coverage

That’s it! This is how you can view the warranty status of your iPhone using the Settings app.

So, these are the few best ways to check iPhone Warranty status. Let us know if you need more help checking your iPhone’s warranty. Also, if you find this guide helpful, don’t forget to share it with your friends.