Whether on an Android or an iPhone, whichever device we use, we store lots of file types on it. If you are a full-time iPhone user, you might already have useful data stored in it, like Photos, Videos, Contacts, Messages, and more.
Some of those data could be very precious, and you can’t afford to lose them. This is why Apple provides you an option to back up your iPhone. There are various ways to back up your iPhone, the most easiest way is the iCloud backups.
iCloud is good for backing up your iPhone, but there could be times when you may have to use your PC to take an iPhone backup. For example, maybe you’ve already used iCloud’s free storage or have trouble accessing iCloud.
Whatever the reason, it is possible to back up your iPhone on Windows. But for that, you will have to use the new Apple Devices app. With the help of the Apple Devices app, you can create a local backup of your iPhone and save it on your PC.
How to Backup Your iPhone on a Windows PC
We will use the Apple Devices app to back up the iPhone on a Windows PC. For those unaware, Apple Devices is an app designed to keep your Windows PC and Apple Devices in sync.
With the Apple devices app, you can transfer photos, music, movies, and more between Windows and your Apple devices. It can also be used to backup & restore your Apple devices. Here’s how to back up your iPhone on Windows.
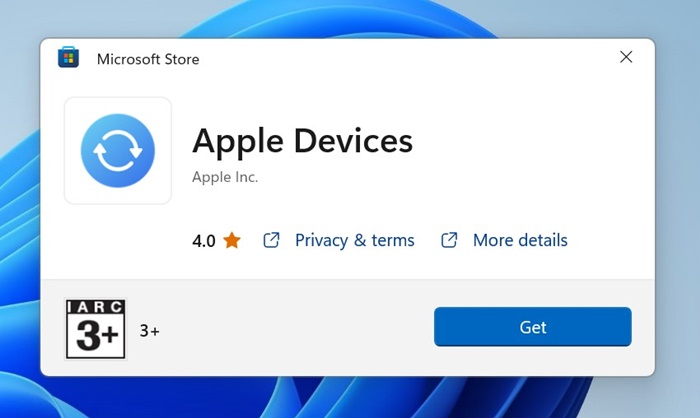
1. To get started, download & install the Apple Devices App on your Windows PC.
2. Once installed, connect your iPhone to a Windows PC using a USB cable. After connecting your iPhone, unlock it.
3. Now open the Apple Devices app on your Windows PC. The app should detect your connected iPhone.
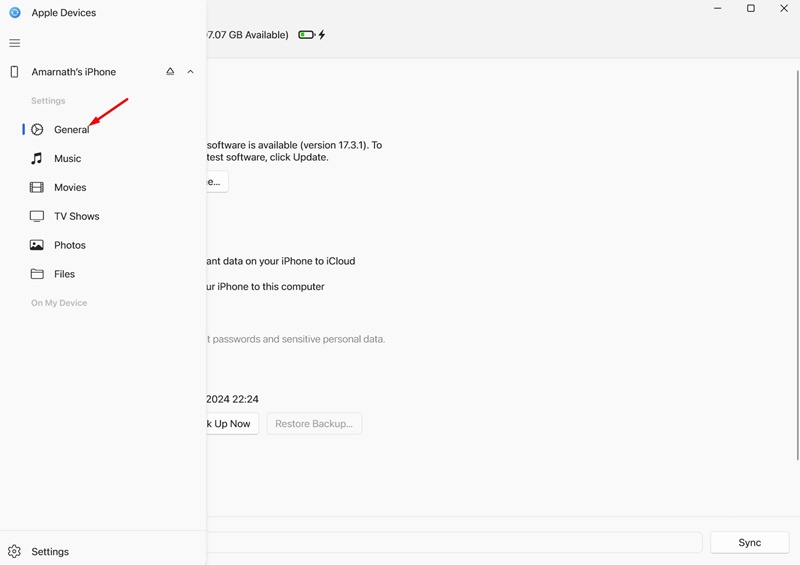
4. Next, switch to the General tab on the navigation menu.
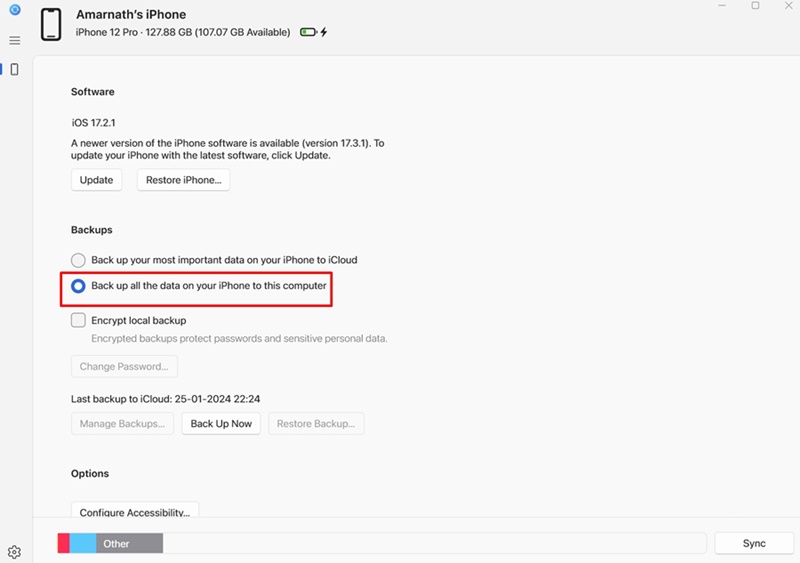
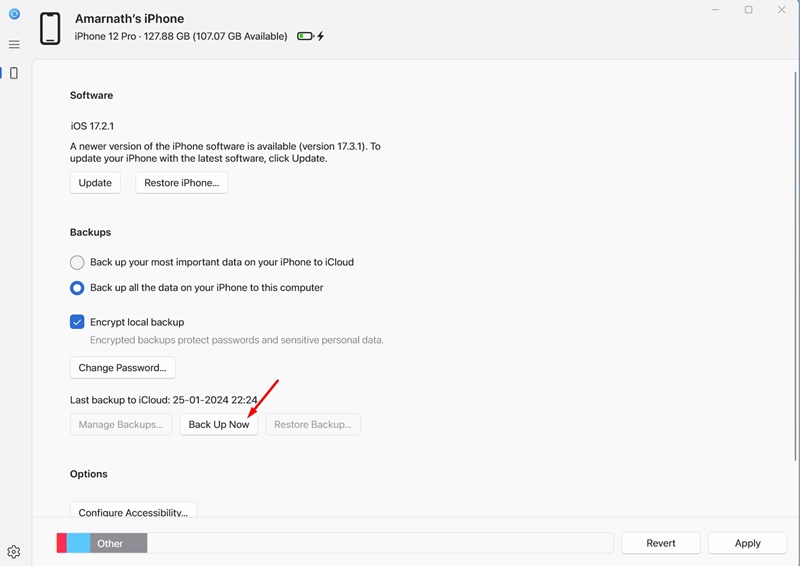
5. Scroll down a bit to reach the Backups section. Next, select Back up all the data on your iPhone to this computer.
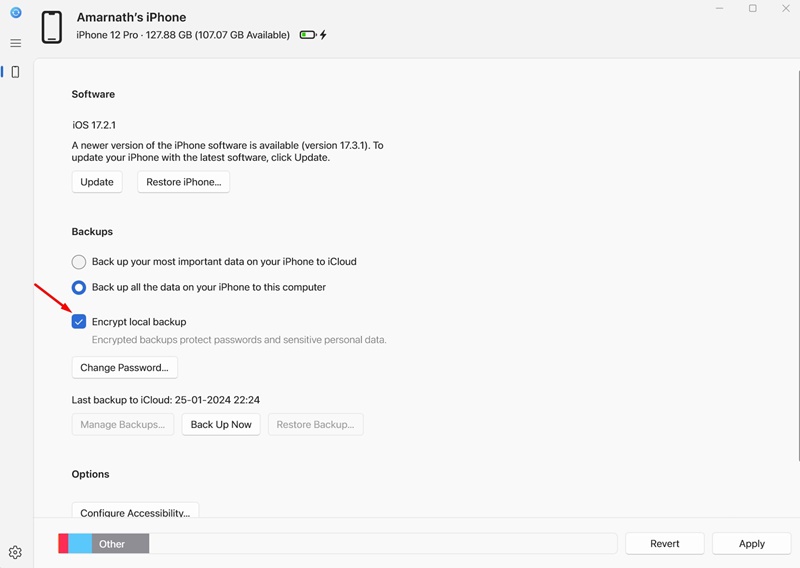
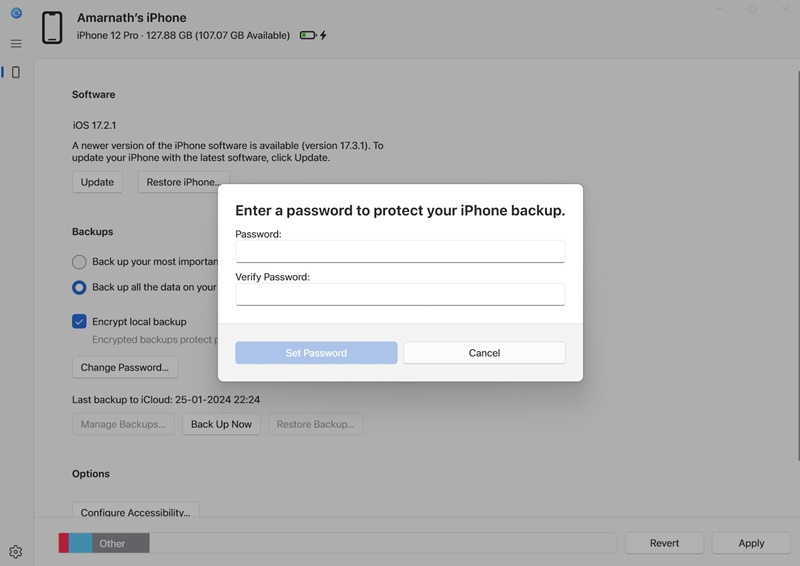
6. You even get an option to encrypt your backup. For that, enable the encrypt local backup option.
7. Now, you will be asked to set a password for the local backup. Enter the password and click Set Password.
8. Once done, click on the Back Up Now button.
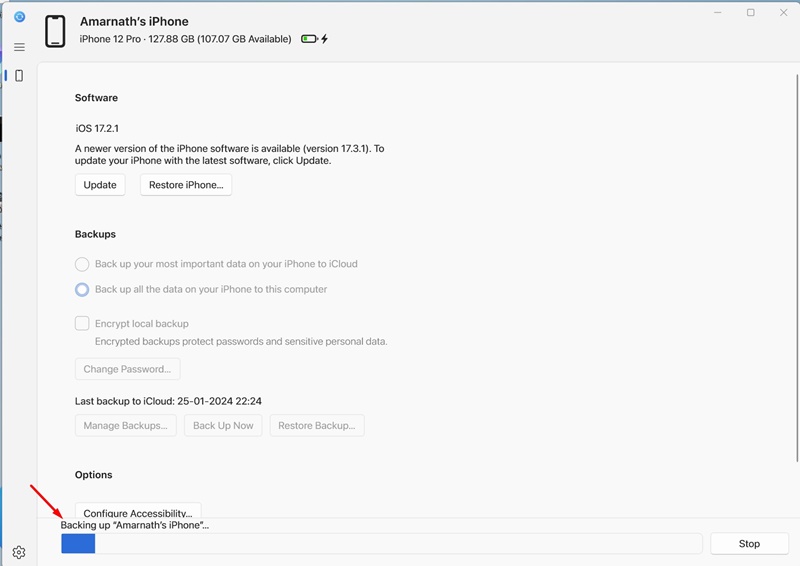
9. This will start the backup. Don’t disconnect your iPhone from the PC until the backup process completes.
That’s it! This ends the backup process. Now, whenever you want to restore the backup, open the Apple Devices app and move to the Backups section. Next, click the Restore Backup button and pick the backup you want to restore.
How to Delete iPhone Backup?
If you have created a new backup, you may want to delete your old one to save storage space. Here’s how you can delete iPhone backup from PC.
1. To get started, download & install the Apple Devices App on your Windows PC.
2. Once installed, connect your iPhone to a Windows PC using a USB cable. After connecting your iPhone, unlock it.
3. Now open the Apple Devices app on your Windows PC. The app should detect your connected iPhone.
4. Next, switch to the General tab on the navigation menu.
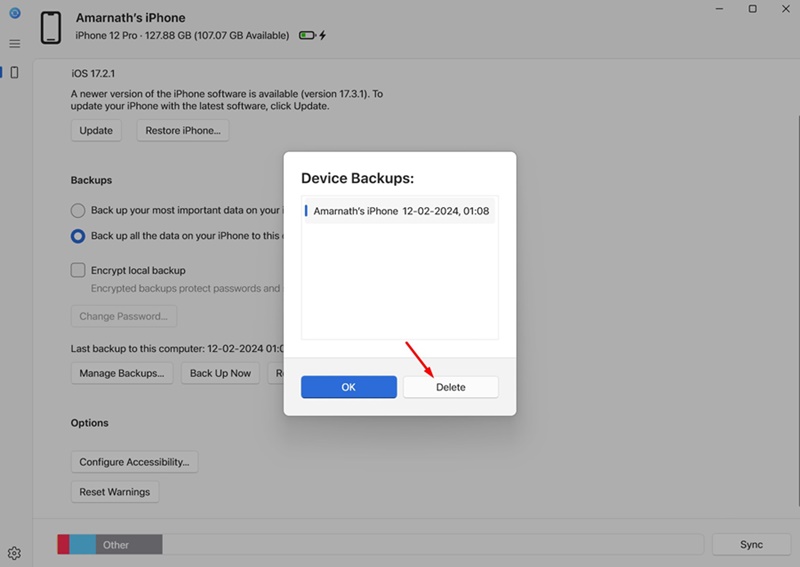
5. Scroll down a bit to reach the Backups section. Next, select the Manage Backups button. Now, you will be able to see all available Backups. Select the backup and click Delete.
That’s it! That’s how easy it is to delete iPhone backup from Apple Devices on Windows.
So, this guide is about how to back up your iPhone using the Apple Devices app on Windows. Let us know in the comments below if you need more help on this topic.

No comments:
Post a Comment