Sunday, August 4, 2024

How to Set Up VPN on iPhone (iOS 17)

1:35 AM 0

 You may want to use a VPN service for various reasons. Let’s say you are browsing the web and suddenly come across a site that failed to open due to geo-restrictions. At that time, you can connect to a VPN app and switch servers to unblock the site.

Other reasons for using a VPN include creating a secure connection over the internet, masking the IP address, encrypting your data, and eliminating a wide range of trackers from the web page.

While VPN is good and available for all platforms, have you ever wondered what a VPN is and how it actually works?

What is a VPN?

VPN is basically a Virtual Private Network that masks your Internet Protocol (IP) address. It hides your IP address and makes tracking difficult.

Since it switches your device’s IP Address and makes it look like it’s from a different location, it can unlock various websites.

VPN for iPhone also does the same and ensures the guarding of your data. There are a few key things to consider while choosing a VPN service.

How to Choose the best VPN Service?

Purchasing a VPN service is pretty easy; you just go to the VPN provider’s website, purchase the VPN plan, download the app, and start using it on your device.

However, that isn’t all you should know before purchasing a VPN service. There are some crucial points a user needs to consider before purchasing any VPN service, like the Encryption Level, VPN speed & server availability, and more.

In one of our articles, we have mentioned all the important factors you should consider before purchasing a VPN service. You can check out that article here.

How to Connect VPN on iPhone (Apps)

Like Android, hundreds of VPN apps are also available for iPhones. You will find VPN apps on the Apple App Store; some are free, while others are premium.

If you want the best results, it’s recommended that you purchase a reputable premium VPN app to use on your iPhone. Below, we have shared the steps to use ProtonVPN on iPhone, which is free to download & use.

1. Open the Apple App Store on your iPhone.

2. Now search for the VPN app you want to download & use. For example, we have used the ProtonVPN. Tap on Get to download the VPN app on your iPhone
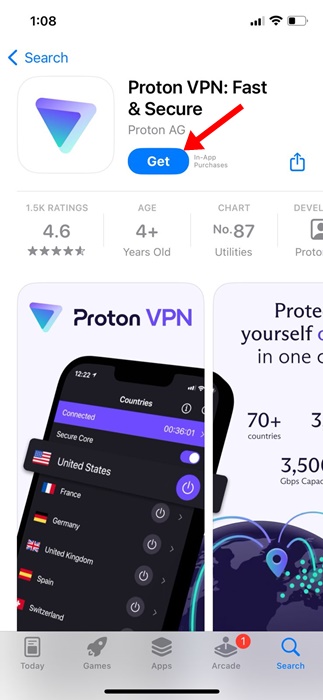
Get

3. Now launch the VPN app on your iPhone. You will be asked to sign in to an account. If you have purchased a VPN plan, log in with the same account you used.
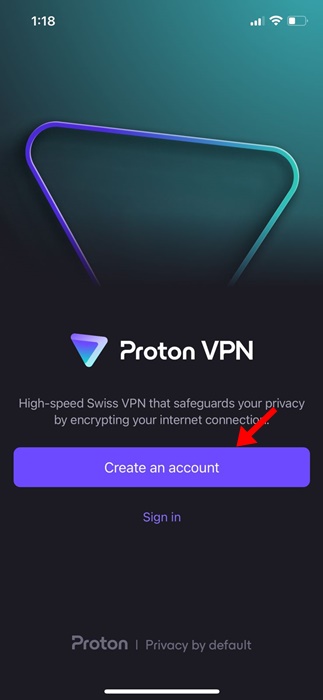
sign in to an account

4. Once logged in, you can see the main interface of the ProtonVPN.
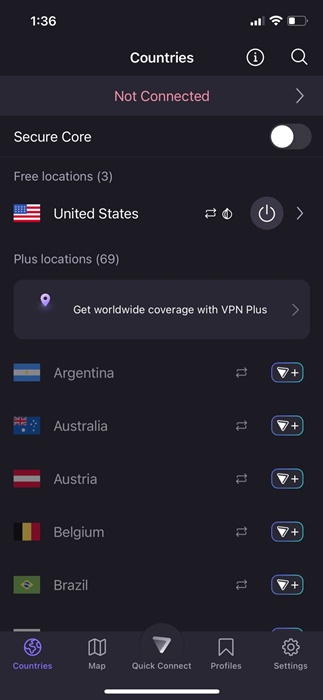
main interface of the ProtonVPN

5. Select the server you want to connect to and tap Connect.
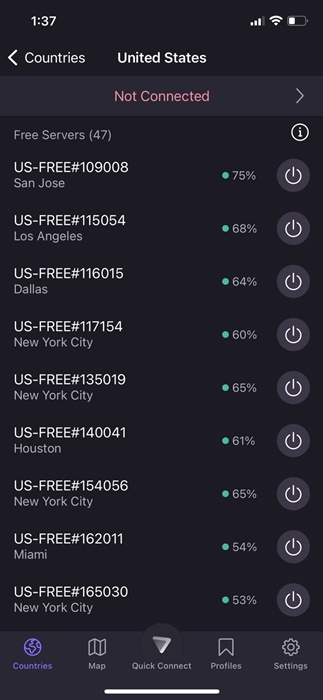
Connect

6. Now, the iPhone will ask you to add the VPN configuration. Tap on Allow.
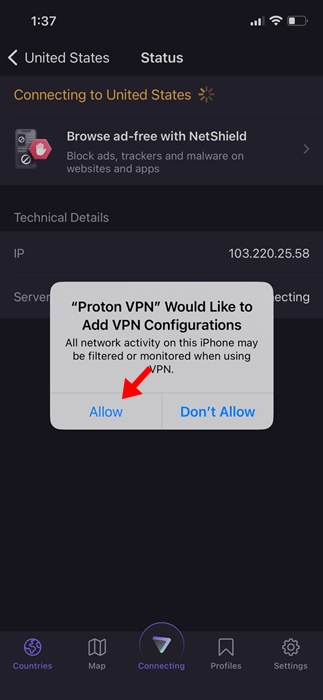
Allow

7. This will connect to the VPN server. You can confirm this by opening your iPhone’s Control Center. The VPN icon will appear at the top, below your network information.
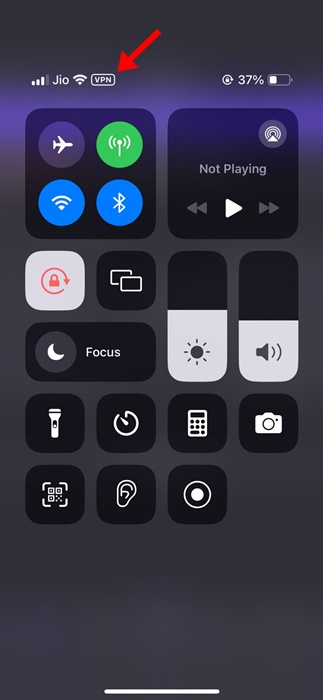
VPN icon will appear at the top

8. To close the VPN Connection, tap on the Disconnect button.
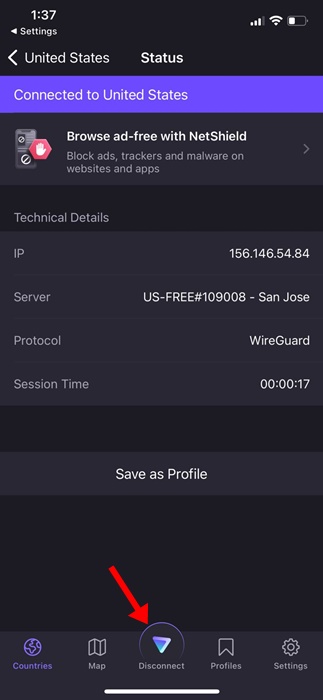
Disconnect

That’s it! This is how you can connect to a VPN on an iPhone with the help of a third-party app.

How to Manually Configure VPN on iPhone

While connecting through a mobile app is super easy, not all VPN providers have a dedicated app. If you have the VPN configuration, you can manually configure the VPN on an iPhone.

1. Open the Settings app on your iPhone.
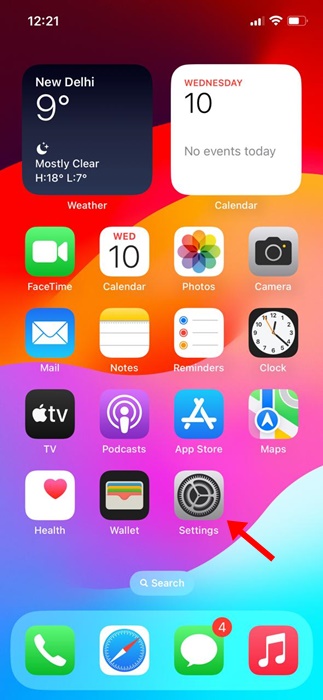
Settings

2. When the Settings app opens, tap on General.
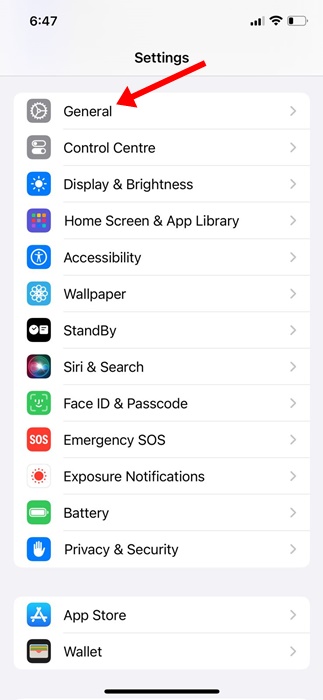
General

3. On the General screen, tap on the VPN & Device Management.
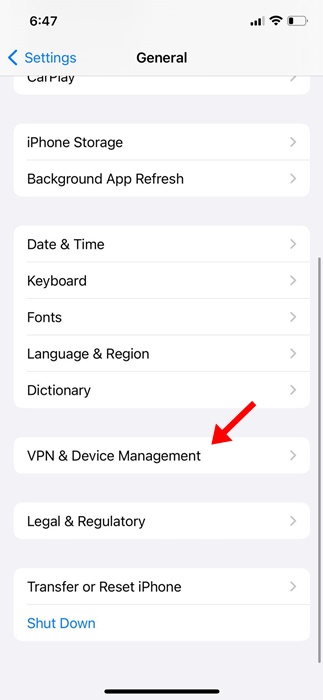
VPN & Device Management

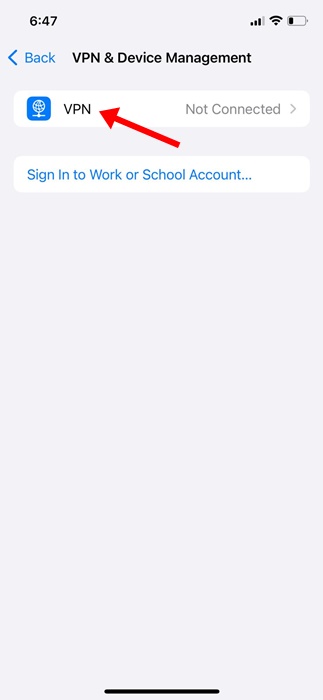
4. Next, tap on the VPN.

VPN.

5. On the next screen, tap on the Add VPN Configuration.
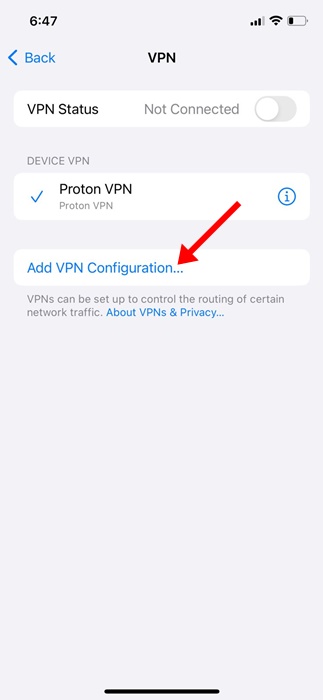
Add VPN Configuration

6. Now, choose the Type and fill in all details. You can grab these details from your favorite VPN provider’s website or contact support and ask for the configuration.
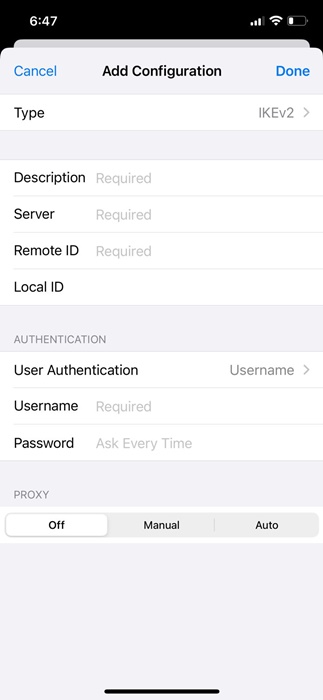
fill in all details

7. After filling in the required details, tap on Done.

8. Now select your newly configured VPN and enable the Status toggle. If everything you’ve entered is correct, you will be connected to the VPN without error.
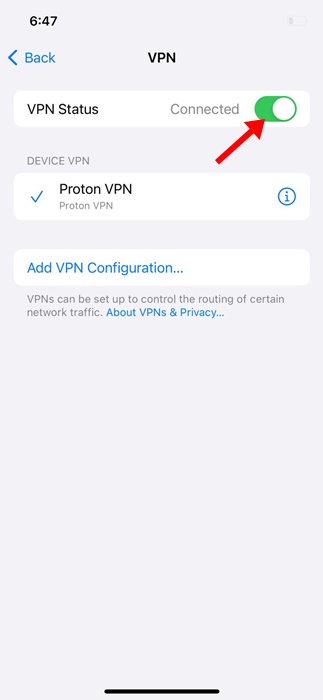
Status

That’s it! This is how you can manually configure & connect to a VPN on an iPhone.

So, this guide is all about how to set up a VPN on an iPhone. Let us know if you need more help connecting to a VPN on your iPhone. Also, if you find this guide helpful, don’t forget to share it with your friends.

How to Use App Library on iPhone (Detailed Guide)

1:33 AM 0

 Let’s admit it: Apple devices like the iPhone and iPad sell well due to its massive app ecosystem. While the app ecosystem of iOS is not as huge as Android’s, you still have hundreds of apps available for different purposes.

If you have an iPhone, you need to sign in to the Apple App Store and download & install the apps that you need. There are no restrictions on installing apps; you can carry on until the storage space runs out, but the problem you may face is organizing those apps.

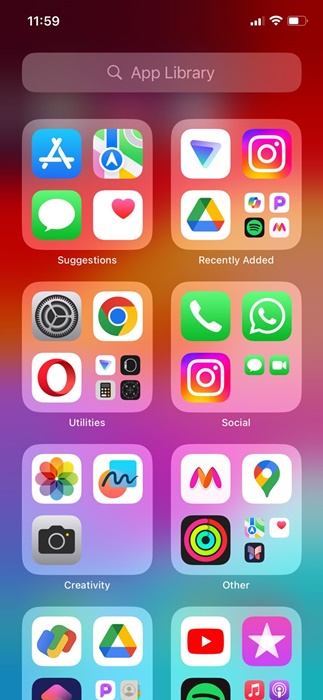
The iOS App Library comes in handy for organizing apps in a better way. The App Libray of your iPhone is basically an organized space that simplifies the app searching process. The App Library automatically picks apps and puts them in relevant folders.

How to Use App Library on iPhone

For example, a ‘Recently Added’ folder in the App Library lists the app you’ve just installed. Similarly, there are App libraries for Social apps, utilities, Entertainment, and more. This article will discuss the iPhone app library and how you can use it to your advantage. Let’s get started.

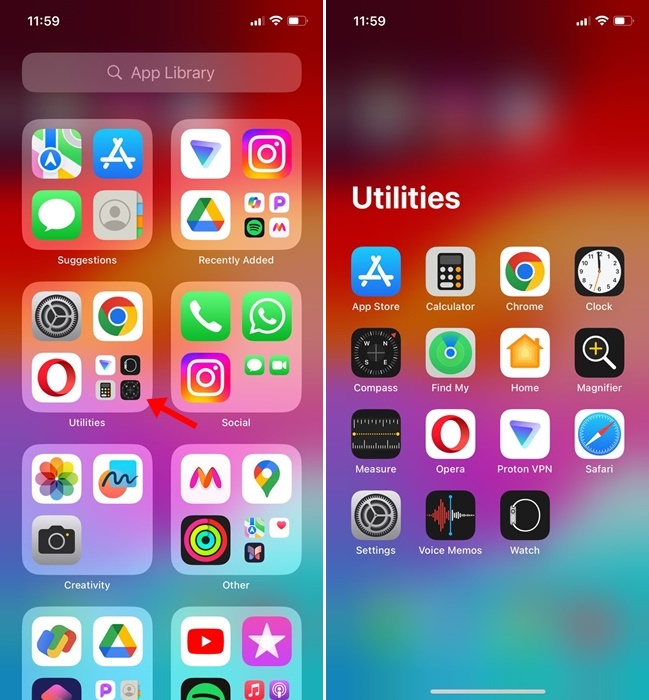
How to Access App Library on iPhone?

Access App Library on iPhone

Accessing the App Library on iPhone is super easy, and you can access it anytime. To access the App Library on your iPhone, you need to swipe left across all the home screens.

So, depending on how many home screens you have, you need to swipe left across all of them to find the App Library.

How to Search Apps in the App Library

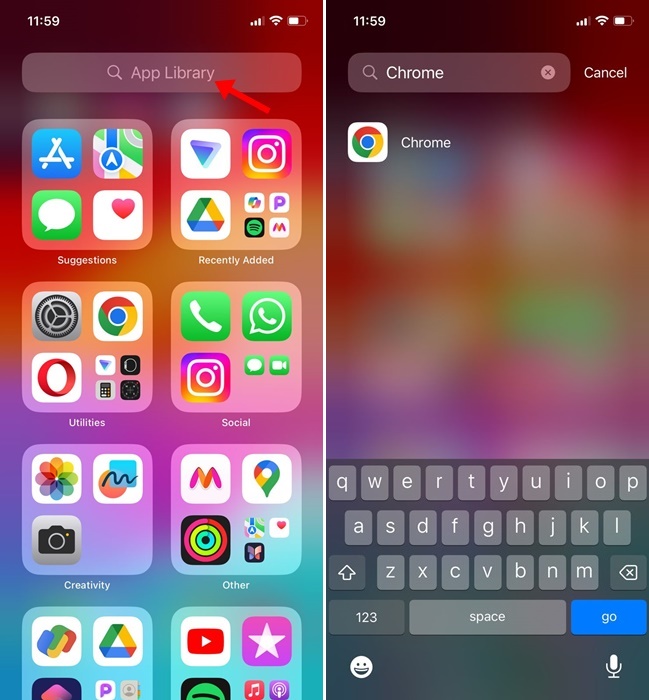
Now that you know how to access the App Library on your iPhone, you may want to know how to search for Apps. While the App Library of iPhone organizes apps, finding the relevant category would take time if you have hundreds of apps.

Search Apps in the App Library

So, if you don’t want to dig through every category to find the app you need, you must utilize the Search feature of App Library.

Just swipe left across the home screen on your iPhone to open access App Library. When on the App Library, tap the Search bar at the top. Now, you can search for and open the app directly from the search results.

How to Open Apps from App Library on iPhone?

Well, you may not need help opening an app from the library since it’s a fairly easy process. However, there are a few things that you should know to make your App Library experience even better.

Open Apps from App Library on iPhone?

  • You can directly tap any App icon on your App Library to open it.
  • On the App Library, you will find several apps with smaller icons; tapping the smaller app icon will open the App Category folder.
  • You can also launch apps from the App Library Search.

How to Move an App From App Library to Home Screen?

The apps you download from the Apple App Store usually move to your iPhone’s App Library. However, if you want quicker access to those apps, you can move those apps from the App Library to your home screen. Here’s what you need to do.

Move an App From App Library to Home Screen?

  • Open the App Library on your iPhone.
  • Now, find the app you want to add to the home screen.
  • Long press on the app icon. Next, drag & drop the app to any home screen.

That’s it! This will immediately move your selected app from the App Library to your home screen.

Can You Create Custom App Libraries?

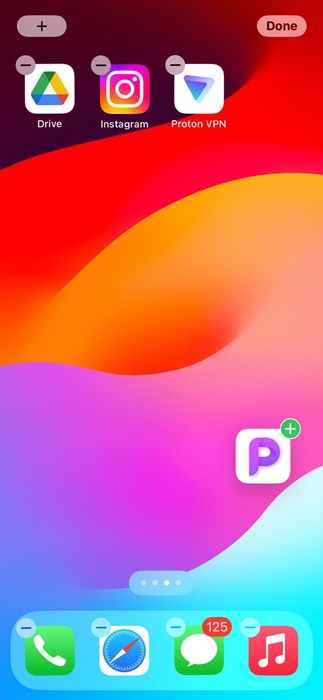
No! You can’t create any custom app library on your iPhone. However, you can create a folder on your iPhone home screen and organize your apps.

organize your apps

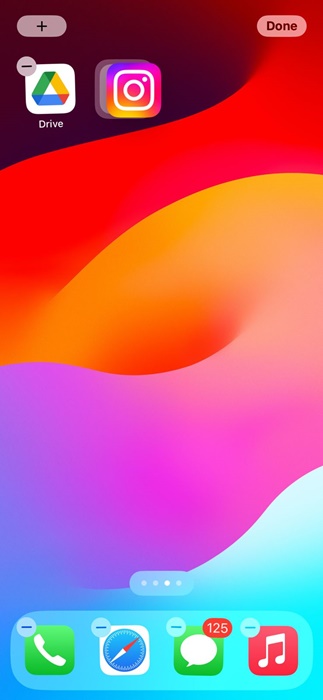
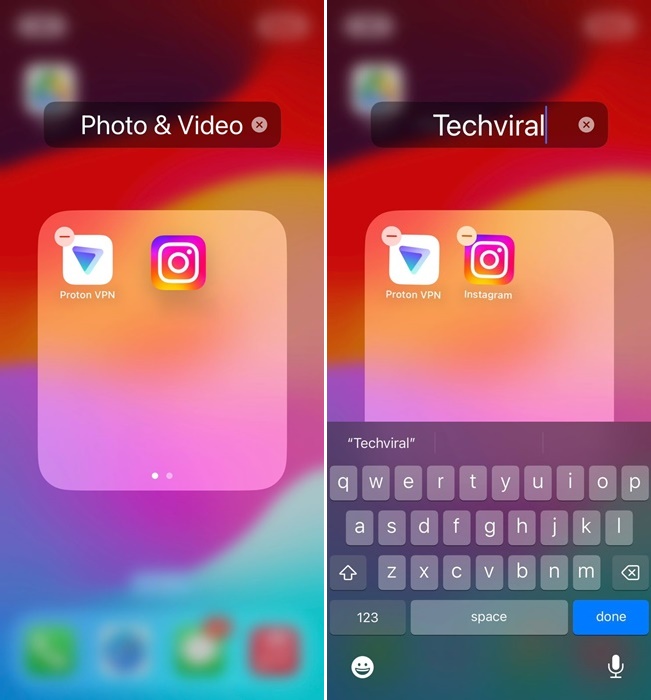
To create a folder, long-press the application icon you want to put in the folder. Once the icons begin to shake and a small ‘-‘ appears in the upper left-hand side of each icon, hold & drag the app to another.

Can You Create Custom App Libraries

This will immediately create a folder. Now, to assign a name, press & hold any of the app icons inside the folder until the apps begin to shake. Next, the title ox of the folder will become editable; type the name you want to assign.

So, this guide is all about how to use App Library on iPhone to organize your apps in a better way. Let us know if you need more help organizing apps on your iPhone. Also, if you find this guide helpful, don’t forget to share it with your friends.
How to Backup Your iPhone on Windows

1:32 AM 0

 Whether on an Android or an iPhone, whichever device we use, we store lots of file types on it. If you are a full-time iPhone user, you might already have useful data stored in it, like Photos, Videos, Contacts, Messages, and more.

Some of those data could be very precious, and you can’t afford to lose them. This is why Apple provides you an option to back up your iPhone. There are various ways to back up your iPhone, the most easiest way is the iCloud backups.

iCloud is good for backing up your iPhone, but there could be times when you may have to use your PC to take an iPhone backup. For example, maybe you’ve already used iCloud’s free storage or have trouble accessing iCloud.

Whatever the reason, it is possible to back up your iPhone on Windows. But for that, you will have to use the new Apple Devices app. With the help of the Apple Devices app, you can create a local backup of your iPhone and save it on your PC.

How to Backup Your iPhone on a Windows PC

We will use the Apple Devices app to back up the iPhone on a Windows PC. For those unaware, Apple Devices is an app designed to keep your Windows PC and Apple Devices in sync.

With the Apple devices app, you can transfer photos, music, movies, and more between Windows and your Apple devices. It can also be used to backup & restore your Apple devices. Here’s how to back up your iPhone on Windows.

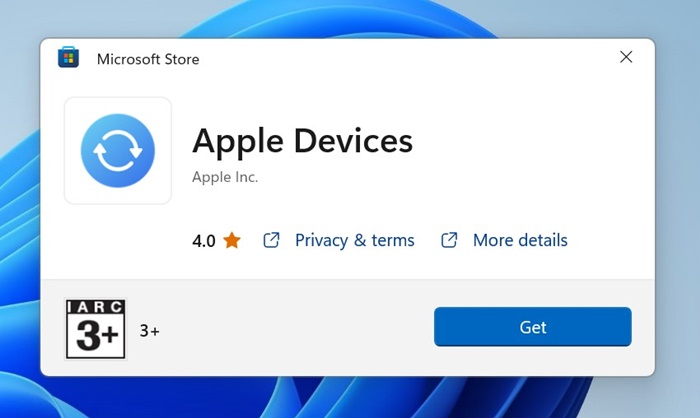
1. To get started, download & install the Apple Devices App on your Windows PC.

download & install the Apple Devices App

2. Once installed, connect your iPhone to a Windows PC using a USB cable. After connecting your iPhone, unlock it.

3. Now open the Apple Devices app on your Windows PC. The app should detect your connected iPhone.

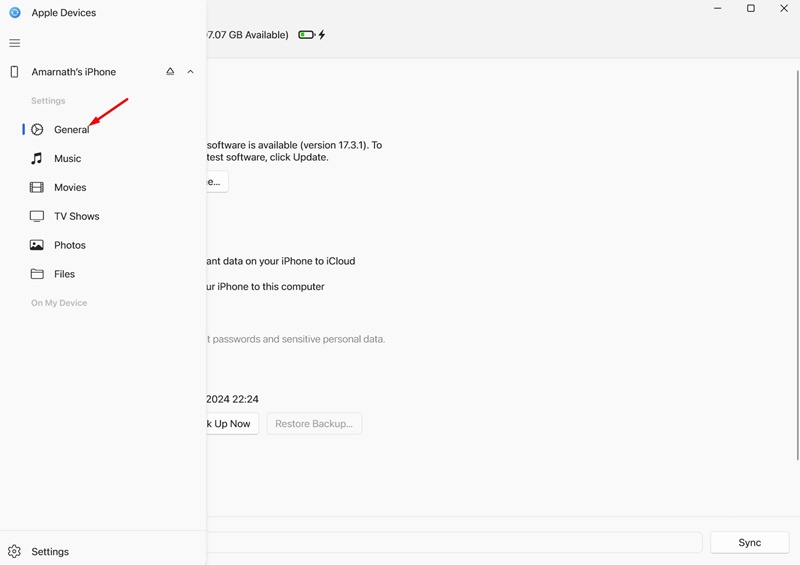
4. Next, switch to the General tab on the navigation menu.

General

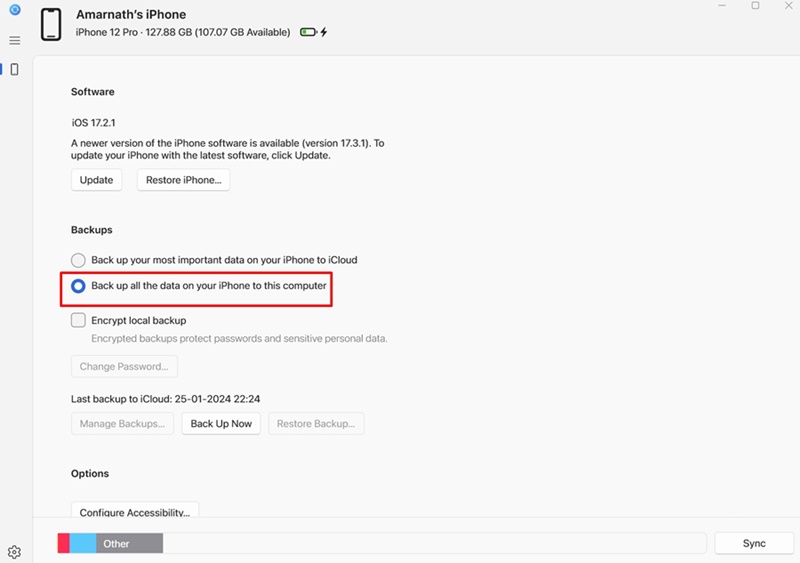
5. Scroll down a bit to reach the Backups section. Next, select Back up all the data on your iPhone to this computer.

Back up all the data on your iPhone to this computer

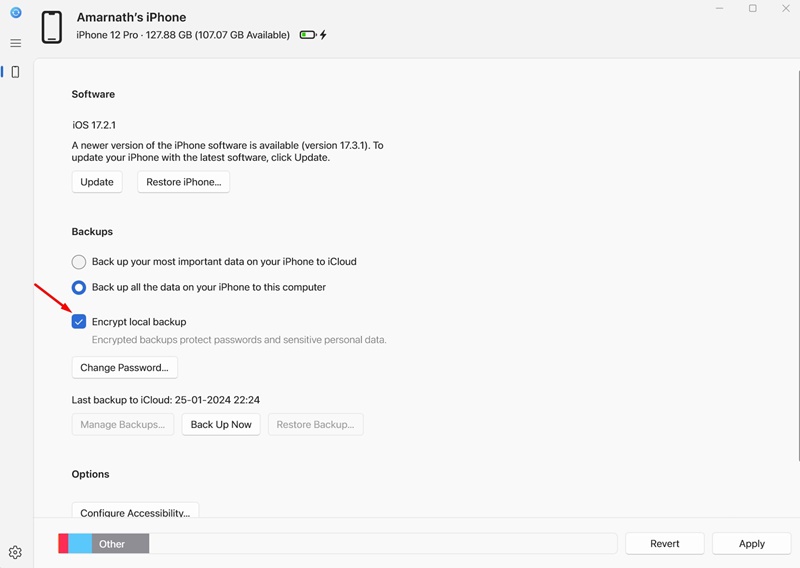
6. You even get an option to encrypt your backup. For that, enable the encrypt local backup option.

encrypt local backup

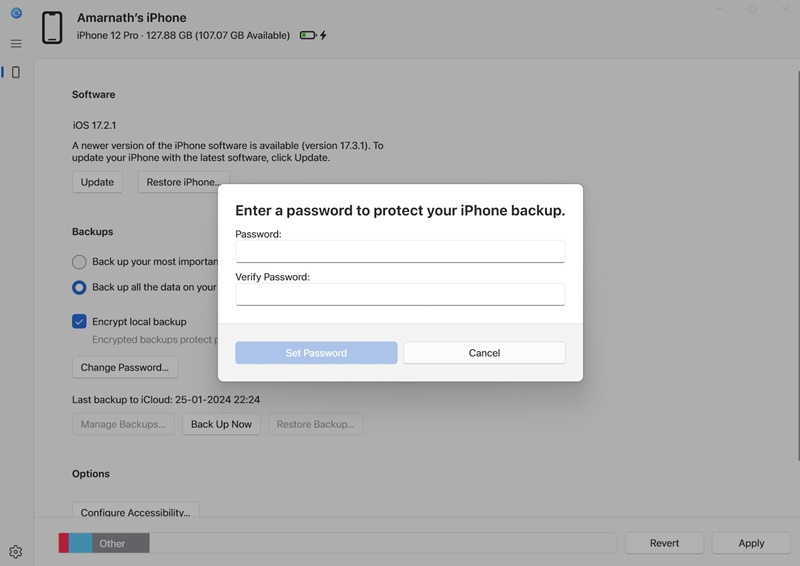
7. Now, you will be asked to set a password for the local backup. Enter the password and click Set Password.

Set Password

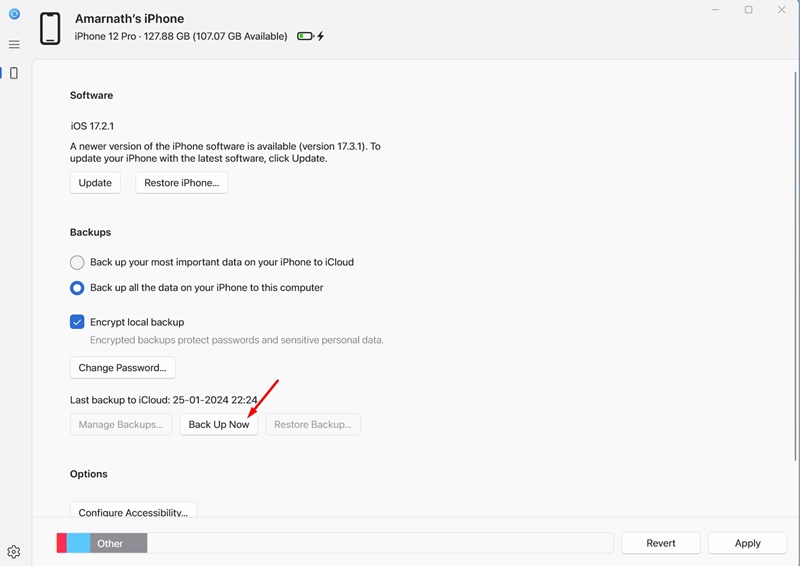
8. Once done, click on the Back Up Now button.

Back Up Now

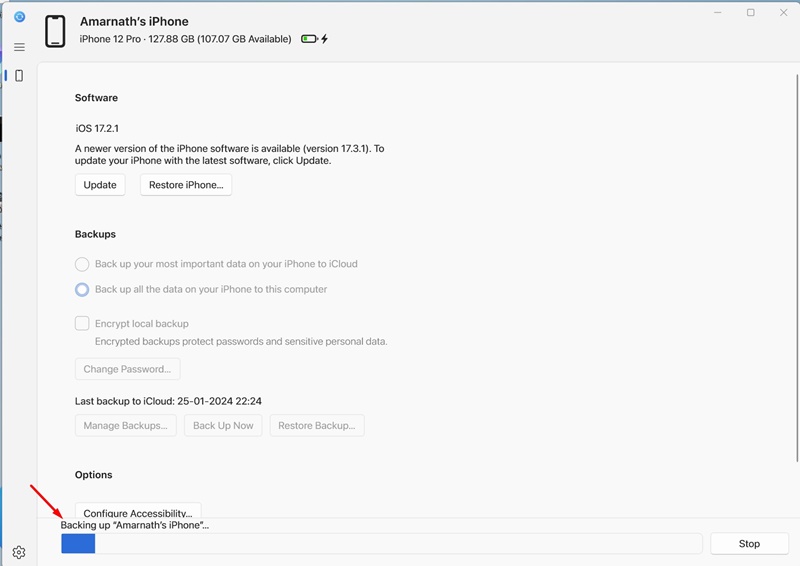
9. This will start the backup. Don’t disconnect your iPhone from the PC until the backup process completes.

backup

That’s it! This ends the backup process. Now, whenever you want to restore the backup, open the Apple Devices app and move to the Backups section. Next, click the Restore Backup button and pick the backup you want to restore.

How to Delete iPhone Backup?

If you have created a new backup, you may want to delete your old one to save storage space. Here’s how you can delete iPhone backup from PC.

1. To get started, download & install the Apple Devices App on your Windows PC.

2. Once installed, connect your iPhone to a Windows PC using a USB cable. After connecting your iPhone, unlock it.

3. Now open the Apple Devices app on your Windows PC. The app should detect your connected iPhone.

4. Next, switch to the General tab on the navigation menu.

General

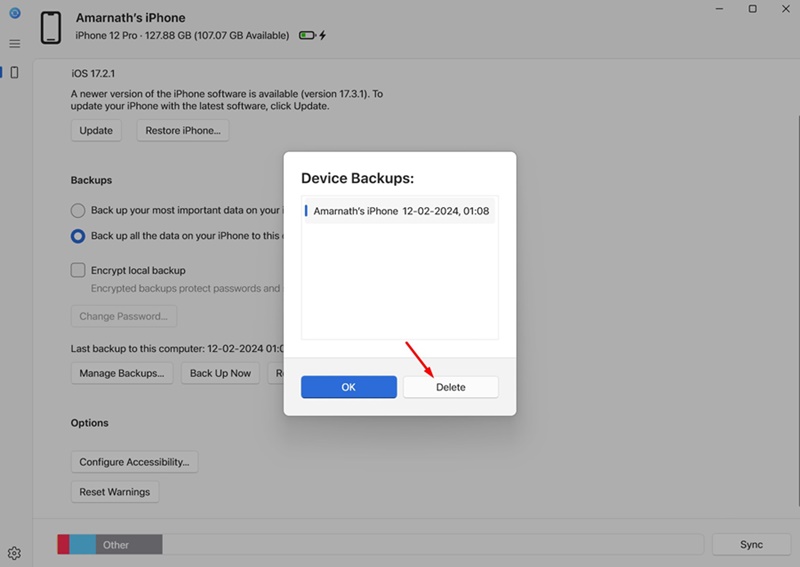
5. Scroll down a bit to reach the Backups section. Next, select the Manage Backups button. Now, you will be able to see all available Backups. Select the backup and click Delete.

Delete

That’s it! That’s how easy it is to delete iPhone backup from Apple Devices on Windows.

So, this guide is about how to back up your iPhone using the Apple Devices app on Windows. Let us know in the comments below if you need more help on this topic.